
Season Extension Part 2
Season Extension Part 2
- by Mike@PiedmontFarmstead
- The Farm
- No Comments
- February 25, 2019
In our last post, we just purchased the hoops for our high tunnel and got them home. After getting the main hoops home we started to get a list of all the other pieces we needed to complete the project. Before we started purchasing the other pieces needed we had to address grading the area where the high tunnel was going to be installed. From the highest point (northeast corner) on the slight slope to the lowest point (southwest corner) was about 12 inches of height difference. This is more than we could handle by hand. It was necessary to cut into the northeast corner and move material to the southwest corner to make a new level pad for the high tunnel. Luckily, a family neighbor was willing to lend his tractor to do the job for the day, otherwise we would have ended up with really sore backs months later.
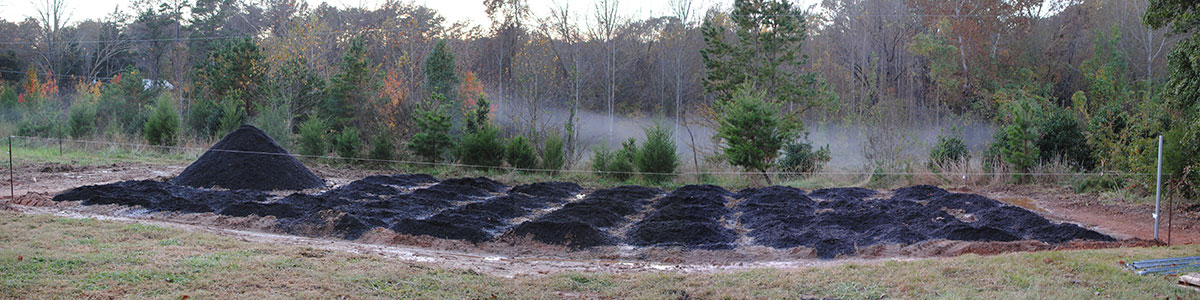
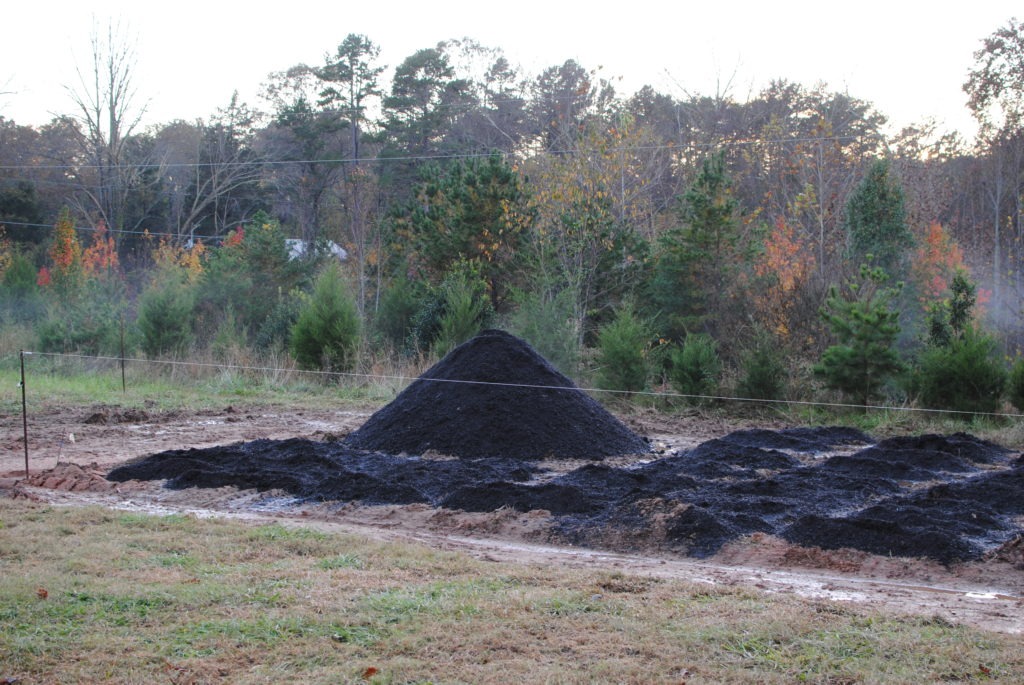
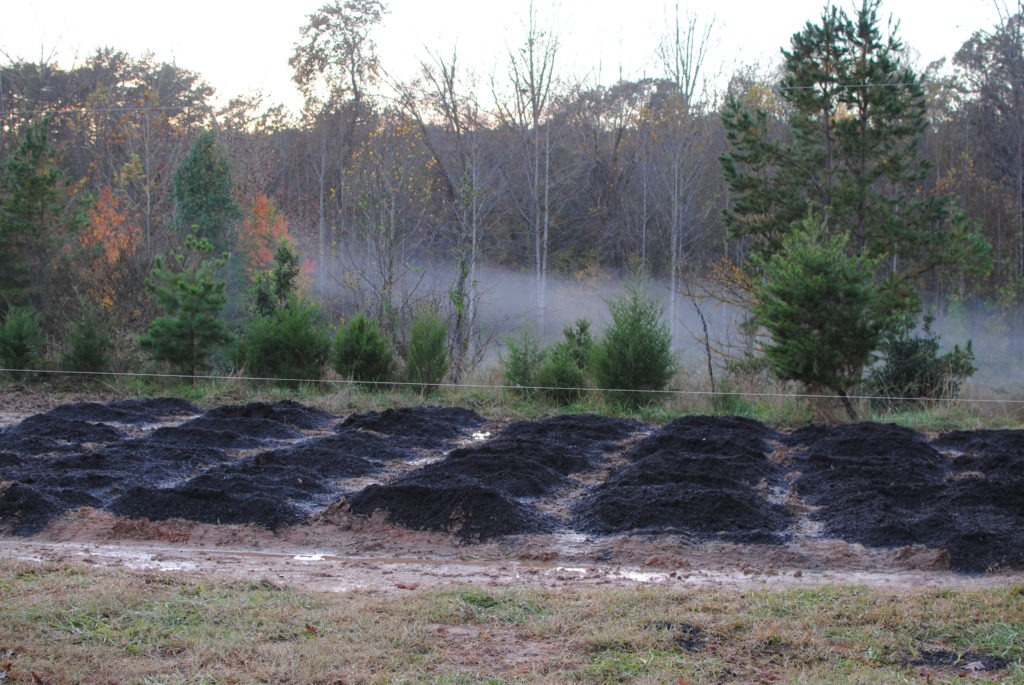
Once we got the tractor to the location it was time to start moving dirt. We were glad we started when we did because it started raining that afternoon. Even with the rain we were able to get the area close to level before the day was done. The rain caused the area to get pretty muddy so we could not get it perfectly level. This was also an opportunity to move the five cubic yards of compost we ordered from Earth Farms into the high tunnel space with the tractor.
The next part of the build, now that the area was level, was to mark out the 4 corners of the tunnel. To find a true rectangle we measured diagonally to assure we had a rectangle and each corner was 90 degrees. After finding our final 30’x60′ dimensions, an unexpected problem surfaced that we would have to fix. The seller of the hoops we purchased stated the greenhouse frame was 28 feet wide, however after getting it home and putting one hoop together we realized it was in fact 30 feet wide. We originally staked out a 28 foot width when we were leveling the area and never adjusted our original staking job! We had just leveled the dirt two feet short of our 30 foot width! This would require more work down the road to level out the remainder of the area.
With the area now staked out, it was time to acquire the remainder of the high tunnel frame. We sourced and purchased the remainder of the metal tube framing from a local fence supply company(Gaston Fence Company) and had it delivered. For our ground posts we went with a thicker wall Schedule 20 2.5” galvanized pipe. This is not really necessary but with our mindset to “build it once” we went with the stronger option. The 2.5” pipe ground posts were purchased in 24 feet lengths that required us to cut them to length. With a little planning beforehand we knew our 6 foot long ground posts would be the right height for what we needed. So each 24 foot length equaled four ground posts and we needed 32 (8 – 24′ long pipes). A chop saw was used to cut the ground posts from eight 24′ long pipes to the 32 6′ long ground posts. Once the pipes were cut to length we drilled a set of two 3/8” holes in one end of each ground posts to connect the hoops too. One hole at 3” that would go through both the ground post and the hoop, and one at 6” to serve as a stop for the hoops were needed. Cutting all those posts, de-burring the ends and drilling holes took a few days of work to get completed. We also cut some additional 2” pipe we purchased for the endwalls. We will explain this part later.
Once we had all of our ground posts cut and ready to go, it was time to set them into the ground. Unfortunately, there is no ground post driver tool available for schedule 20 2.5” pipe, similar to those available for smaller pipe. Our initial work around was to use a post hole digger to set all the posts in the ground instead of hammering them in. A few 2 foot deep holes later we were looking for alternatives. We ended up hammering them in with a sledgehammer which ended up working pretty well. A thinner material would have distorted the tops of the posts, but because of the thicker pipe and the wet ground we only saw a negligible amount.


All of the 32 six foot posts were hammered and leveled two feet into the ground with 4 feet above ground. At a two feet depth we could get the best height, aiming for enough room on the sides to walk under the frame comfortably. Before moving forward, we tested one of the hoops to double check height and discovered we were too high. We could spare another foot and elected to drive the ground posts in another foot. It turns out the extra foot of pipe was driven into very hard subsoil. After getting the posts in another foot, making sure they were vertically level along the way and testing a hoop again, we had our final height. We could begin to see the high tunnel take shape with the first hoop in its place.
With the ground posts now in place it was time to add the rest of the hoops to the ground posts. Our hoops are 2” pipe (actual 1.90″) and our ground posts 2.5” (actual 2.375″), this was intentional so that the hoops would slide inside the ground posts. Before installing the hoops, we went around to each ground post and installed 3/8” bolts into the holes at the 6” pre-drilled holes. The bolts were 3.5″ in length with two washers, a lock washer and a nut to tighten everything down. Tightening the bolts provided the “stop” for the hoops to slide into the pipe and rest on. It is important to make sure the bolt end of all 4 posts are facing inside so it does not interfere with the plastic covering. It was also necessary to make sure all the bolts face north-south in a parallel orientation to the 60 foot length of the sides. The remaining ground post holes (at 3”) were left open until later on in the install when the complete frame was up to insure we had the correct alignment.
After installing the stop bolts into the ground posts, we started assembling each hoop on the ground and then sliding them into place. Our high tunnel has an alternating pattern of every other hoop having a truss to provide more support from heavy snow loads or wind. We were VERY thankful that the seller we got the frame from numbered each of the hoops and the corresponding pieces. This made assembling the high tunnel very easy.

Next up were the side braces. These are very important part of any tunnel. Most greenhouses have these braces but a lot of high tunnels lack this option. The brace can be a simple piece of pipe that connects the end hoops to a hoop eight feet away at a diagonal. Attach one side near ground level on a ground post and the other side around five feet up. This creates a brace much the same way field fences are done, the diagonal pipe supports the end hoop from falling by bracing it against the bottom of another ground post (that is much more difficult to move). All for corners were installed loosely so we could level the hoops later.
Dropping a plumb bob (string with a weight on it) from the end hoop at its peak would allow us to check that it was vertically in line and the endwall and would not be leaning later on. We also ran a string line between each of the end ground posts on that end. This would serve as a guide to where the end wall should be. We loosened the side braces and adjusted the hoop until the plumb bob line touched the line between the ground posts and re-tightened the side braces. The top most purlin at the peak we installed first. We first installed the purlin loosely across the length of the high tunnel. This allowed us to get the whole purlin up and screw the purlin pieces together. Working from the first hoop we tightened each cross connector making sure that each hoop was spaced on the same four-foot interval as the ground posts. To install the four remaining purlins we went through the same process insuring that the four-foot spacing was maintained between each hoop and the purlins were level to the ground. After all five purlins were installed we also installed our lumber hip rail to the sides using TEK screws on the same four feet spacing. When the high tunnel is covered, the hip rail is where a wiggle wire channel will get attached as an attachment point for the plastic. Hip rails were located 4 feet to the center of the 2×6, above our established ground level.

In the snowy picture above, we were almost done with the metal framing. All we had left to do is finish drilling through the already existing holes in the ground posts through to the 2″ hoops and installing 3/8” bolts to tighten everything down. These bolts were the same 3.5″ length with two washers, a locking washer and nut.
We will continue this DIY build in part 3 where we add lumber, endwalls and wiggle wire track!
Thanks for reading,
