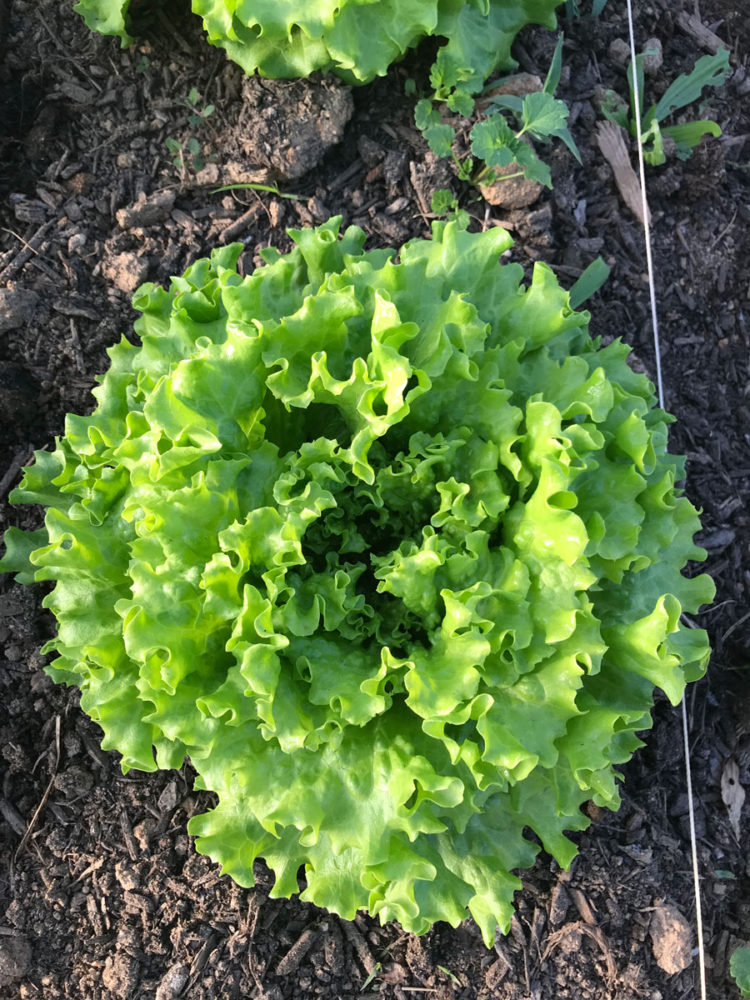
Gaston County Farm

Season Extension Part 3

Season Extension Part 3

Its hard to believe that this update is now more than four months after we started this project, thinking it would take us two months to complete. There are lots of reasons, but the biggest being rain. I’m not sure what exactly our totals are here but we’ve been getting rain what seems like non-stop with only a few days of dry weather. Our progress has been slow because of this, I will tell you it is not fun to work in the cold rain, but we’ve had to do it a few times to get something done.

We left off in the last update after getting the metal frame erected. Now it is time to move onto the wood framing of the endwalls and adding all the channel for the greenhouse plastic attachment.

First order of business is to take our 2″ pipe we had cut with the ground posts and get those into the ground. Each post is 3 feet in length and we drove these in with a heavy hammer. These posts are going under the end wall to support and raise the wall slightly off the ground. I drew some rough plans on the end walls with doors and came up with seven vertical studs(See image below). We located each of the 2″ posts just under where each stud would go to give the most support. 

While hammering the support post into the ground the tops of the post mushroomed and deformed(we knew this would happen). We drove them in just enough to leave room to cut the tops off with a saws-all. The correct depth of each post was established by running a sting line between the two sides at our established ground level. Our end walls would rest on the top of the posts and a 2×6 foot base board attach to the outside of the bottom 2×4. This allows the base board to be both attached to the 2″ posts using TEKS screws and screwed into the bottom sill for the end wall.

Once we finished cutting the posts to length we could then begin building the endwall. We learned it was necessary to assemble most of the endwall on the a flat surface before we installed it. Once installed the bottom sill would not allow us access to screw the studs into the sill from underneath, we made the mistake of installing the bottom boards first and realizing this later.

The end wall is attached to the end hoop by metal brackets on the 2x4s, a bolt with a brace band around the hoop. The remainder of the end wall was much like the framing of a house and straight forward so we will not go into much detail about how we did that. A few things we did notice however, when we added shutters to the top section of the wall we did not leave enough room for error and had to cut the vertical studs shorter twice to accommodate the shutter. The second was making sure the studs are vertical with a level, especially around the doors.

February 2, 2019 - Posts supporting the endwall.
February 2, 2019 - One endwall done.

If you’ve followed along on this build you’ll remember that we did not level the entire area because of an error measuring. Because of this we only installed and built one endwall because we needed access into the tunnel from one side. After finishing one end wall we found a local contractor with a tracksteer to complete the leveling around the high tunnel. It took them only half the day and we had everything leveled out. While the contractors were here working on the high tunnel job we also had them push around some dirt in front of the high tunnel to level out some holes we had dug when we moved our apple trees. Here are some neat before/after pictures of the area all finished up.

February 9, 2019 - Before clearing/leveling.
February 10, 2019 - After clearing/leveling.

With the end walls complete we could move onto installing all of the channel for the greenhouse plastic. We ended up with two different kinds of channel on our high tunnel: one is a extruded two piece system and the other is the more common wiggle wire setup. The extruded setup came with the frame and was only enough to do the hip rails, while the wiggle wire setup will cover the rest of the tunnel. Channel needed to be attached to both endwalls, around the perimeter of each(on hoops, base boards, around doors/shutters) and down the hip rails on both sides. Wiggle wire was installed along the end hoops that will hold both the endwall and main tunnel plastic in place.  Installation of both systems was fairly easy when attached to the lumber areas.  Attaching  the channel to the end hoops because of the need to drill pilot holes for the TEKS Screws was a little more time consuming.

Once we finished attaching all of the channel to the high tunnel it was time to pull the plastic and cover the structure!

We ordered our sheet of greenhouse plastic up from AM Leonard (we had great experience with them and very good price!). Once the plastic was delivered we needed to get a handle on the best way to pull and attach the plastic. We found a great series of videos that were very helpful in giving some tips and direction on how to install the plastic. Below are those videos from Tunnel Vision Hoops, LLC. Check out their YouTube Channel for more videos on High Tunnel construction.

We got lucky and had a day on a weekend where there was no wind and no rain(it has been raining here almost constantly for four months). We got the help of our dads to get some additional hands in the install that ened up being immensely helpful! We followed Tunnel Vision’s process above, things went pretty well and the whole structure was covered in about 4-5 hours. The remainder of the day we spent roughly installing the roll up sides. We lacked a few pieces we would need later to finish the sides, so we temporarily secured them.

March 9, 2019 - Before getting the plastic up.
March 9, 2019 - Endwall plastic
March 9, 2019 - Pulling the top cover.
March 9, 2019 - Endwall plastic
March 9, 2019 - Last pull of the endwall plastic
March 9, 2019 - Covered!

A note on the wiggle wire installation, we found that going back later and making sure the wire is fully seated in the channel was necessary and provided a little more tightness to the plastic. The job was definitely not perfect and we also needed to redo a few sections by removing the wiggle wire, tightening and reinstalling.

One of the remaining projects left to do on the high tunnel were the doors. We have a 4′ x 7′ door on each end of the structure. The doors are intentionally wide to accommodate anything we might need in the future (Example: a garden/harvest cart that spans the 30″ rows). We first built the doors on a flat surface out of 2x4s. The doors did not fit when we went to install, luckily I had not covered them with plastic yet. I had made both the doors exactly 4′ x 7′, not leaving room for hinges or the door to swing open. So we had to take them apart and cut 3/4″ off of the height and width to allow the doors a bit more room to fit. Once the doors were the right size we attached the same greenhouse plastic to the door frames using a roofing nails with a plastic cap. We then took the doors attached the hinges and hung them on the high tunnel. We also added a sliding latch to lock the doors shut.

March 10, 2019 - Building the doors
March 12, 2019 - Installing the doors on a cold morning.

The very last thing to do was finish up the roll up sides and install flashing(more on that later). The roll up sides use 3/4″ EMT and some self tapping pan head screws. To attach the plastic we used 3/4″ snap clamps that allowed us to adjust the sides until we got a level rolling up side. Once the side was rolling up evenly we used pan head screws to secure the snap clamps to the EMT pipe to insure the plastic would not slide out. Worth mentioning is the anti-billow line needed (the zig zag line pictured below). This line prevents the sides from blowing around, securing the roll up sides between the ground posts and the line.

March 17, 2019 - With flashing installed.
March 17, 2019 -

Voles have been a problem in our garden and with a new high tunnel we wanted to address this proactively. Our research found a common solution using galvanized 1/4″ hardware cloth. Burying galvanized metal has its limits as the wire will degrade in a few years. Not wanting to dig ditches every few years around the tunnel to replace the hardware cloth we looked for another material/method that would last longer. Stainless Steel is far too expensive. However, an aluminum option would last longer in the ground. After a little creative searching/thinking we got the idea to use roof flashing.  We picked up a few rolls of 16″ x 50′ aluminum flashing. We installed this similarly to how other have installed hardware cloth bending a 4″ lip that would become the bottom of the flashing once installed. The theory of the lip is that a vole would tunnel into the flashing and realizing it could not get through, try to go under it encountering another barrier ~10″ deep, losing interest. Once we got the ditches dug out all the way around the structure we installed the flashing and back-filled, finishing the job.

That actually completes the structure, its been a long 4.5 months to put this together but we are very happy with the results. We have lots of plans to use this tunnel to its full extent and we’ll be sure to keep posting updates in the future.

high tunnel

Thanks for reading,

Mike_Sig

Notes: We learned later that our wiggle wire was not fully seated into the channel and had to go back and push the wire in the rest of the way. This tightened up a lot of the looseness you can see in the pictures above. Also, This really has to be done on a sunny day, it was about 60 degrees that day, but cloudy. When the sun came out we noticed that the plastic was loose enough to flap in the wind and we had to go back and tighten up the hip rails to ensure no damage happened to the plastic flapping in the wind. We were able to pull the plastic another 2-3 inches tighter on each hip rail.

Facebook Twitter Google+

Leave A Comment